To be frank, a lot of folks ignore regular brake maintenance. Oh, they pay attention to periodic pad and rotor replacements since it’s pretty evident when the pedal goes to the floor and nothing happens. However, as a general rule, brakes are rarely heard -- or seen -- unless some big crashy kind of thing happens.
If you have concerns about how healthy your vehicle’s stopping power is, there are some deep-dive cleaning and maintenance processes you can perform to keep them working efficiently for longer than the average life cycle. So, let’s dig our own hole into to the depths of braking systems and see what we can find on how to clean up those brake parts.
Why Brake Cleaning Is Important
Over time, brake components gather dust, dirt, and other contaminants that can affect your vehicle's braking efficiency – and therefore, your safety. Regular cleaning helps prevent these accumulations from causing uneven wear and poor stopping performance.
Here are some additional things to keep in mind when it comes to cleaning brake parts.
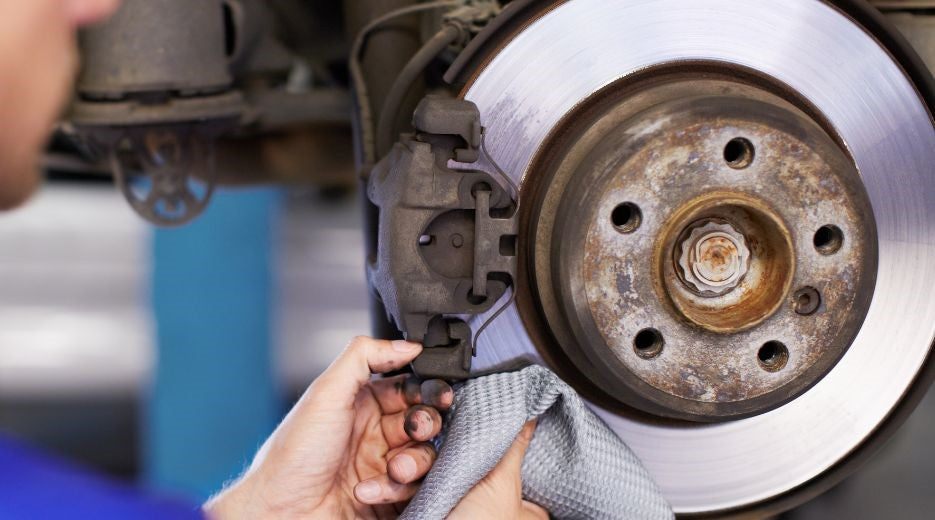
Removal of Brake Dust. Brake dust is a byproduct of daily operation. Associated materials are typically comprised of metal particulates that accumulate over time. Eventually, thick grime-laden layers can appear that affect performance.
Corrosion Prevention. Brake dust and grime involve corrosive elements that lead to the emergence of rust and corrosion. Corrosion can weaken braking systems, leading to reduced effectiveness.
Optimized Braking. Clean systems simply perform better. Eliminating brake contaminants ensures that efficient rotor/pad contact is maximized, leading to optimized braking performance.
Early Identification of Brake Problems. Regular cleaning also allows for regular inspection of brake components. This can involve pads, rotors, calipers, and affiliate parts that offer an opportunity to identify signs of wear, damage, or other issues.
Enhanced Safety. The brake system is crucial for overall safety. A clean system supports efficient deceleration when needed.
Brake Cleaning Tools & Products

In order to execute a proper brake cleaning, you will require a few tools and cleaners.
Brake Cleaner Spray. These products are specifically formulized for brake components. Relevant cleaners are typically aerosol-based and readily available at automotive supply-chain outlets. CRC Brākleen is (and has been for many years) the industry leader when it comes to quality brake parts cleaners. The fast-drying formula cleans well and doesn’t leave any residue behind.
Microfiber Towels. These are handy for wiping down brake components and absorbing any excess brake cleaner.
Wire Brush. If brake components are particularly dirty, you may require a little extra scrubbing power.
Brake Lubricant. Applying brake lubricant to contact points after cleaning helps prevent any annoying squeaking noises and ensures smooth movement. CRC and Permatex are both reliable brands.
Safety equipment. As with all automotive DIY projects, wearing protective gear is crucial to your health and safety. A few personal items you may want on hand include safety glasses, rubber gloves, and a face mask. Tool-wise, for safe brake cleaning you’ll need a jack and jack stands, a lug wrench, and some wheel chocks.
Safety And Prep Tips
The brake cleaning process involves chemical solutions along with delicate brake components – which means it's really important you maximize safety and follow proper protocols.
First things first, be sure to work in a well-ventilated area. Cleaners produce toxic fumes, so you want to maintain adequate air circulation throughout the process. Remember that some brake cleaners are highly flammable, too. So, keep the potential of open flames and sparks away.
While brake cleaning isn’t a terribly complicated job, it can go sideways quickly if you don’t proceed with caution. Prioritize your safety gear by wearing protective glasses and rubber gloves, and be sure to take your time when raising and securing the vehicle. Always use suitable lift support equipment such as a reliable jack and secure jack stands to ensure stability and safety.
Lastly, adhere to any manufacturer's instructions; different vehicle models and brake systems might necessitate distinct cleaning procedures. (Consult your vehicle's owner manual or service guide for specific manufacturer-recommended guidelines and precautions tailored to your particular brake system.)

Detailed Brake Cleaning Process
Now, here’s a step-by-step on how to clean brake parts.
- Park the vehicle on a level surface.
- Engage parking brake and shut off vehicle.
- Place wheel chocks.
- Don safety glasses and rubber gloves.
- Raise the proper corner of the vehicle and secure with jack stands.
- Unscrew the lug nuts and remove the wheel.
- Execute a visual inspection of all components, including calipers, rotors, and pads, looking for signs of significant wear or physical damage.
- Spray brake cleaner directly onto brake components, ensuring that the cleaner coats all surfaces likely to exhibit grime and debris.
- If necessary, use a wire brush with rigid bristles to scrub brake components, being careful to not apply too much scrubbing force.
- Use a clean, lint-free rag or towel to remove excess cleaner, grime, and moisture.
- Ensure that all surfaces are thoroughly dry before proceeding.
- Following manufacturer's instructions, apply a thin layer of brake lubricant to brake contact points.
- Replace wheel and properly torque all lug nuts.
- Lower the vehicle until the wheel barely touches the ground, remove jack stand and fully lower the vehicle.
- To clean remaining brake parts, repeat the steps for each wheel.
Post-Cleaning Checks'

Before driving, you want to test the brakes to ensure proper operation. Apply the brakes gently a few times to check for any abnormal noises, vibrations, or changes in brake performance. If you notice any issues, consult a professional mechanic for further inspection.
If no immediate issues are apparent, then find a safe location where brake testing can be executed with zero obstacles or traffic, and apply these checks.
Pedal Feel. Apply gentle pedal pressure and observe pedal feel. The brake pedal should exhibit a firm but consistent resistance. If the feel is spongy, too soft, or exhibits a long pedal, there could be air in the brake lines or other issue requiring detailed investigation.
Responsiveness. Apply brakes gradually using moderate pressure. Establish how quickly the system responds and how effectively the vehicle slows and/or comes to a stop. Brakes should engage smoothly without delay or hesitation.
Odd Noises. Listen for odd noises during braking, including squealing, grinding, and/or scraping. These events indicate issues with pads or rotors requiring additional mechanical involvement.
Overall Performance. Perform various stop tests. Start with moderate pressure, and then gradually increase pressure to test overall brake efficiency. Focus on the vehicle's tendency to stop promptly while avoiding any pulling to one side or the other.
Fade. Execute multiple stops in a controlled area such as a parking lot. Focus on signs known as ‘brake fade’. This condition is exhibited by the marginalizing of braking performance, usually derived by heat buildup.
ABS Functionality. If the vehicle is equipped with an anti-lock braking system (ABS), it should be tested accordingly. Perform a controlled stop while applying firm pressure to the brake pedal. The on-board ABS system should initiate creating regular vibrations within the pedal assembly. Ensure that the evolution engages without hesitation, no unusual noises, and/or any other inappropriate responses.
Warning Lights. Investigate the instrument cluster for any illuminated warning lights. If any associated warning lights illuminate or flash during any of the aforementioned tests, it could involve an issue with the overall braking system. In turn, this event may involve further inspection or consultation with a professional mechanic.
Final Inspection. After all tests are completed, execute a final inspection of all braking elements. The goal is to identify any follow-on leakage, obvious damage from the testing regime, or any other problems.
There you have it -- a complete and detailed brake cleaning process. Again, the goal is to create a habit-forming process that leads to extended life of all brake system components, while at the same time, enhancing safety throughout. Consider applying this process on a quarterly basis, as part of your regular vehicle maintenance schedule.