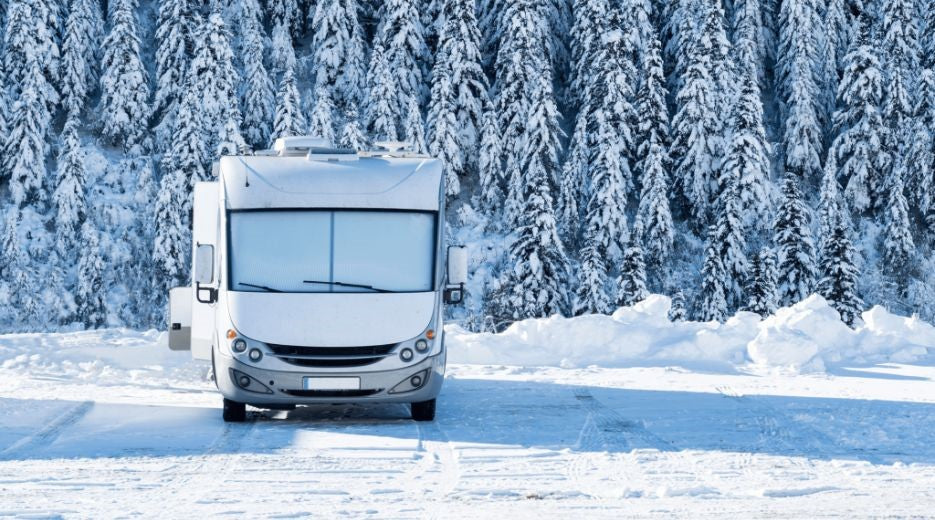
You’re used to preparing your car for winter, but have you done any RV winterization? Before cold snaps, snow, rain, and all of the other elements of winter arrive, you’ll want to winterize your camper to keep it in tip-top shape. Even if it’s unlikely you’ll be hitting the road throughout the season, you still want to ensure it stays protected from outdoor elements, fluctuating temperatures, and even potential storage damage until you're ready to travel once again.
Learn how to protect your camper and get it ready for harsh winter weather with this handy checklist – plus our tips on what to look for and tackle before the first frosty morning arrives.
Why RV Winterization Matters
Whether you’re planning to store your RV inside a well-protected garage or have a trip or two planned for the winter, it’s not just smart to practice RV winterization; it’s absolutely critical! Winter can wreak havoc on your camper, causing a lot of extra wear and tear. This, in turn, can lead to more expensive repairs, as well as a shorter overall lifespan.
Winterization helps limit any potential damage caused by winter weather, preventing problems like frozen water lines, exterior damage, and worn-out tires. With some proper winterization in the fall, you can better maintain your RV for many seasons to come.

What to Prep for Winter (and How to Do It)
Below, we’re sharing the details on what your camper needs ahead of winter, and what steps you can take to ensure it’s safe, secure, and functional.
Plumbing and Water System
If left alone during the winter, freezing temperatures are likely to cause significant damage to your RV’s plumbing and water system. Temperatures can fluctuate widely, going from the 60s to below freezing multiple times over the course of the season. If your RV is hanging out in storage while temps drop, any water that’s left sitting in the lines can freeze, expand, and potentially cause the pipes to burst, leading to not only an absolute mess but possibly even structural damage.
So, here’s a look at how you can empty your camper’s water lines and get the plumbing in winter-ready shape:
Drain, flush, and clean your RV holding tanks (freshwater, gray water, and black water).
Empty any standing water in appliances like showers, toilets, ice makers, refrigerators, and dishwashers, as well sink and shower faucets.
Install a water heater bypass kit (to keep antifreeze out of the water heater).
Add RV antifreeze into the plumbing system.
Drain your water heater (once antifreeze is in the system).
If you want to make sure you’re getting every last drop of water out, you can finish this RV winterization by drying out all of the water lines with an air compressor. It’s not a must-do, but it can be helpful if you aren’t 100% certain you’ve cleared out all of the lines.

The Interior
After a long spring and summer camping season, the inside of your RV has definitely seen some use! Ahead of winter’s arrival, you’ll want to go through the interior thoroughly, addressing stored items and giving everything a good scrub down.
Here’s how to tackle the interior from driver’s seat to living spaces:
- Wipe down cabinet exteriors and other surfaces.
- Remove bed and bath linens and wash, then store.
- Clear out the refrigerator and cupboards of any lingering food.
- Clean the floors, counters, bathroom, and kitchen
- Add a dehumidifier or a few desiccants (drying agents) inside the cupboards, windowsills, and corners to absorb dampness.
You’ll also want to assess what you’re storing inside the RV. Instead of using it as a space to stash all your camping gear, it’s a good idea to lighten the overall weight – especially if you plan to keep your tires on the camper all season long. Pull out any items that aren’t RV essentials, like suitcases, clothes, canned goods, or toys and store them in garage for a little less weight.
Exterior
Whether you’re giving your RV some space in the driveway or inside a garage, you’ll want to take care to winterize its exterior to ensure the harsh winter weather doesn’t destroy the siding, paint, insulation, or any critical components that might be exposed.
Here’s what to cover up, clean up, and add for extra winter protection:
- Wash and wax the RV exterior.
- Cover any and all exterior vents with vent covers. (For extra waterproofing, you can apply plastic wrap over the vents, then add the cover.)
- Put your RV on blocks for even weight distribution and less tire wear.
- Cover the exterior with RV skirting at the base and a protective overall cover.
- If you do leave the tires on, use tire covers.
If your RV will be inside a garage, you don’t necessarily need to use a top-to-bottom cover or RV skirting. However, this extra step can ensure an extra layer of protection should dirt, debris, or pests be lurking inside the garage.

The Battery
While you don’t have to worry too much about what’s under the hood as you winterize your camper -- since you’ll give everything a checkup come spring to ensure your RV is road-ready -- you do want to remove your battery.
Why bother with the battery? Well, your RV’s battery is a pretty critical component, and letting it sit all winter can cause it to discharge and freeze. To protect it, you’ll want to disconnect the battery and store it somewhere temperature-controlled, like an insulated garage, basement, workshop, or even a closet. Cold weather drains batteries faster, and you don’t want to wind up with a dead battery come spring.
The Tires
Lastly, it’s time to check your camper tires. Freezing temperatures can cause serious tire woes, like cracking or unexpected wear. So, as you winterize your RV, you’ll want to take special care to ensure your tires are cleaned, cared for, and covered.
Here’s how to do this:
- Clean your tires and rims thoroughly.
- Check tire pressure and make sure it fits your RV’s recommended pressure.
- Park your RV on a firm, clean, and level surface.
- Add tire covers.
Alternatively, you can jack your camper up, either on its own built-in hydraulic leveling jacks or jack stands. This takes the RV’s heavy weight off the tires, and it can help prevent flat spots or excess wear if you aren’t able to move the camper every so often throughout the winter. It’s a great way to prevent strain, but it is an extra step that may not suit everyone’s storage options.