Learning how to mount and install a winch the right way can save you time, hassle, and possibly a recovery situation from going sideways. If you’ve already picked out a high-quality winch for your 4x4, truck, or SUV—congrats, you’ve knocked out the first few steps! Now comes the part where you put it all together.
This guide is built for first-timers and anyone who just wants to double-check their approach before installing. We’ll walk through all the key phases of a DIY winch install, including how to choose the right mounting location, how to handle the wiring, and what to test before hitting the trail. Along the way, we’ll include some helpful tips from real-world installs that can help smooth the process and keep things safe.
Step 1: Pick Your Mounting Method and Location
By the time your winch shows up at your door, you’ve likely already determined your winch weight rating requirements (1.5x your vehicle’s gross weight is a good baseline) and chosen the brand and model that suits your needs. Now it’s time to lock in where and how that winch is going to live.
Permanent vs. Removable Mounts
Most winches are mounted permanently to an aftermarket steel bumper. Tubular or fabricated steel bumpers come in all shapes and sizes. These styles are both great options, especially if the aftermarket bumper features accommodations for a winch, including pre-drilled holes for mounting. Lower-tier options might require you to drill these holes, or perform other slight modifications to secure the winch.
Some specialized 4x4 vehicles come from the factory with heavy-duty provisions for mounting a winch, including a dedicated plate hidden behind the OEM bumper. If your model vehicle does not have the OEM mounts, a purpose-built winch mounting kit compatible with your rig and bumper configurations is likely available.
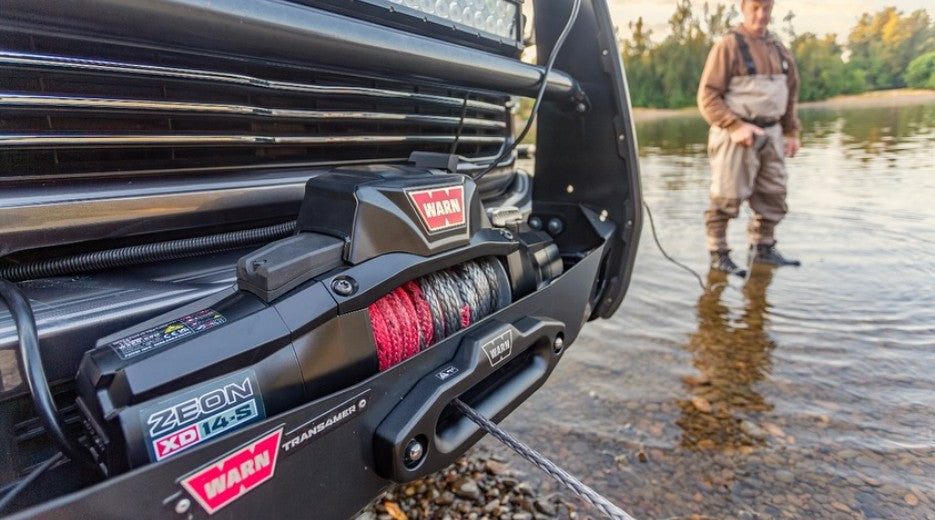
Mounting a winch sheltered under or behind a bumper is the most secure and weather-protected option, making it ideal for vehicles used regularly off-road or in unpredictable conditions.
Another option is to place your winch in a cradle combined with a hitch receiver mount, which can be inserted into the front or rear hitch of your vehicle. This gives you the flexibility to swap the winch between vehicles or remove it when not in use. Additionally, it can be mounted in any other location where a hitch mount might be located and even on top of a trailer deck with the right setup.

If you plan to use a hitch mount, make sure your hitch is rated to handle the winch’s load. You do not want to buy a winch mount designed for UTV and powersports applications and use it with full-size vehicles. Also, be aware that you’ll need a wiring solution front and rear. Some users install Anderson-style electrical quick-connect power cable plugs to make this swap easier.
Winch Mounting Orientation
When it comes to winch mounting orientation, think of it like setting up your winch for the kind of work it’s going to do.
- Foot down mounts put the bolts underneath the winch, which is common for bumper or winch plate installs, but those bolts are taking more of the load, so they’ve got to be tight and torqued right.
- Foot forward mounts have the bolts pointing toward the front of the vehicle, which means the winch is pushing against the plate instead of relying on bolt strength alone, which is a little easier on the hardware when you’re pulling hard.
Some winches are designed for one style only, while others can do both; so always double-check the manual before beginning installation.
Winch Compatibility Check
Before you unbox anything, double-check that your bumper or winch plate matches the winch’s bolt pattern. Most winches for typical off-road vehicle recoveries use a 10x4.5-inch standard footprint, but some vary.
Also, make sure there’s enough clearance for the winch drum and motor. The last thing you want is to get halfway through the install and find out your winch rubs on the bumper frame.
In some cases, if room is tight, a winch unit—like the WARN ZEON Platinum—can be made smaller by disassembling the control pack and reassembling it remotely with a long relocation kit.
Step 2: Pre-Install Prep
A little pre-planning makes the whole install smoother. Start by laying out your tools and hardware, reading the winch manual, and confirming the mounting hardware included. Some bumpers or mount kits include their own grade-8 bolts or specialty brackets; use them if provided.
Gather Your Tools
- Socket set with ratchets and extensions
- Torque wrench
- Wrenches
- Wire cutters and strippers
- Heat shrink or electrical tape
- Zip ties
- Drill with bits

Confirm the Wiring Route
Next, pop the hood and plan your wiring path to the battery. You want the shortest, safest route possible. Avoid sharp edges, exhaust components, or moving suspension or steering parts. Also consider chassis flex, as this will be a concern for any off-road vehicle. If your battery is in a tight spot or your winch is rear-mounted, you may need to use longer gauge wires and secure them along the frame.
Step 3: Mounting the Winch
Once everything checks out, it’s time to bolt up the winch. If you’re using a bumper-mounted setup, you may need to remove the bumper or gain access to the back side of the mounting plate.
- Position the winch on the mounting plate and align the bolt holes.
- Insert the mounting bolts through the winch and into the plate. Use flat washers and lock washers if provided.
- Torque all bolts to the manufacturer’s specifications using a torque wrench. Don’t skip this step because over- or under-tightening can compromise performance or safety.
- Install the fairlead (roller or hawse) if it’s a front mount. Make sure it’s centered and flush with the bumper face.
- If using a synthetic line, feed the line through the fairlead gently to avoid fraying.
Pro Mounting Tips: If you’re working in a tight spot, a quick trick is to use a little painter’s tape to hold the washers in place while you thread the bolts—it’ll save you from a lot of dropped hardware and frustration. For extra rust protection, especially if you live where roads get salted, dab some anti-seize on the bolt threads before tightening everything down. And if you had to drill any new holes or ended up with bare steel showing, hit those spots with a good coat of primer or paint before bolting things up. Those small steps go a long way toward keeping corrosion from sneaking in later.
Step 4: Wiring the Winch
Wiring your winch takes a steady hand and a little patience, but it’s every bit as important as bolting it down. Too small of wire gauge, sloppy crimping, or incorrect hookup can cause shorts, kill performance, or, in the worst case, start a fire.
Take your time, double-check your connections, and route the cables so they’re safe from heat, sharp edges, and moving parts. If electrical work isn’t your strong suit, it’s worth having an automotive wiring pro handle this step so you’ll know it’s done right, and you’ll have peace of mind when it’s time to put the winch to work.

Wiring Basics
- Red cable (positive): From winch solenoid box to battery positive terminal.
- Black cable (negative): From winch ground to battery negative terminal.
- Some kits include a separate ground strap from the winch body to the frame. Always use it if provided.
- Install a fuse or circuit breaker near the battery on the positive line. This protects your electrical system from surges or shorts during operation.
Routing Tips
- Use split loom or corrugated tubing to protect wires in engine bays or under the chassis.
- Secure all wiring with zip ties every 6–12 inches.
- Avoid running wires near hot surfaces like exhaust manifolds.
Quick Connects
If you want to make your winch removable or add power access points elsewhere, winch wiring bundles and quick-connects make it all an easy and smart upgrade. Quick-disconnect kits make it easier to detach the winch for storage or service.
Synthetic vs. Steel Cable Winch Line
There are several major differences and many reasons why synthetic or steel cable winch lines might be better for your needs. Regardless, synthetic line users should always use a fairlead designed for synthetic material, typically a smooth aluminum hawse, to avoid fraying.
Step 5: Final Setup and Testing
Before calling the job done, run through a final checklist.
Checklist Before First Use:
- Confirm all mounting bolts are torqued
- Verify positive and negative connections are tight
- Check that wires are secure and not rubbing anywhere
- Install the hook and line stopper if needed
- Install the controller (wired or wireless) and verify the connection

For both synthetic rope and steel cable, you’ll want to spool the line under light tension. Run the line out and then back in while keeping slight resistance on the cable using a winch line weight or helper pulling. This prevents uneven wraps and nesting, which can damage the drum or cable during use. It is important to remember to follow all the standard winch operation safety procedures at all times, and everyone should wear safety glasses and gloves.
Additionally, take care to avoid these common mistakes:
- Don’t test the winch under full load the first time—start small.
- Always wear gloves when handling the line.
- Keep fingers and clothing away from the drum and fairlead during operation.
Ready to Hit the Trail
Installing a winch can be a rewarding first mod and a serious upgrade in your vehicle’s recovery ability. With the right prep, tools, and know-how, it’s absolutely a job most DIYers can tackle over a weekend.
From choosing your winch mounting options to double-checking your winch wiring best practices, each step plays a role in ensuring your setup is safe and reliable when you need it most. Take your time, follow the directions, and don’t forget to test the system before your next off-road trip. And remember—Parts Via is here for all your recovery needs, including quality winch accessories from top brands you know and trust. Take advantage of our fast, FREE ship-to-store option at checkout to save big on your next purchase.